Midcentury Bathroom Remodel on a Budget
/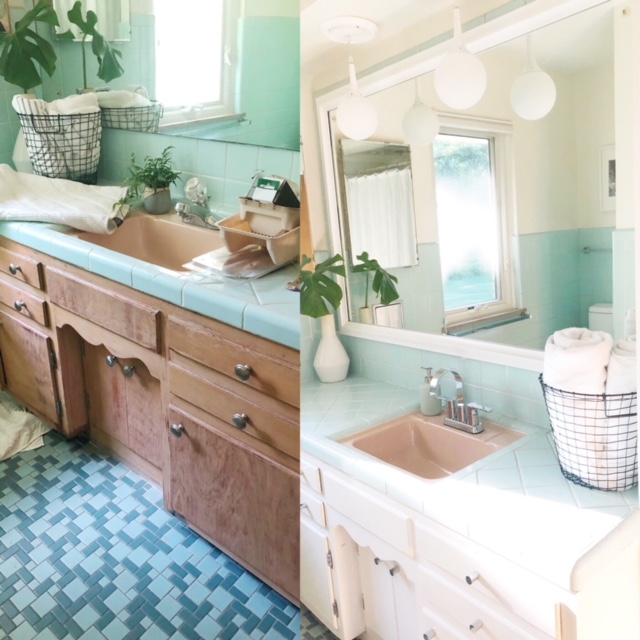
We're all about working with whatcha got, baby blue tile and all.

I really wish I could be a fly on the wall in 1951 when Quarry's homeowners walked around the store together and said, "You know what would look really cool? Baby blue tile, green floors, and pink everything else."
Over the past few weeks, we have been tackling this beauty with simple updates that really made a huge difference. Honestly? It turned out way better than either of us expected!
Keep reading for easy tips and links to the products we purchased:
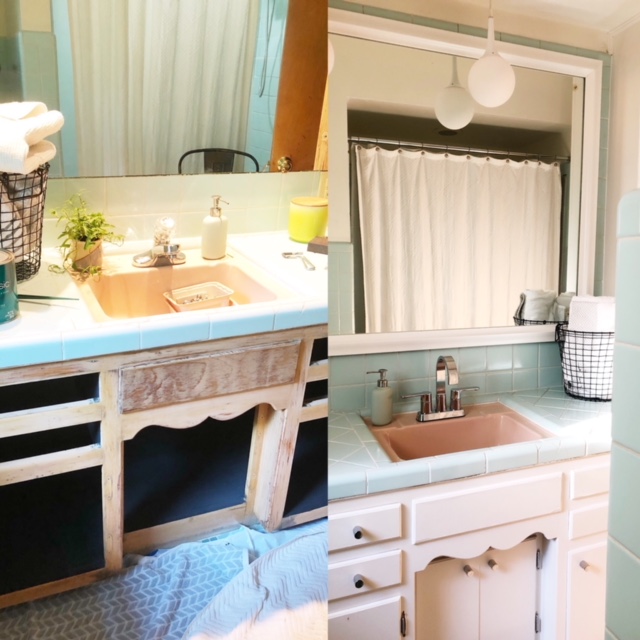
Paint Those Cabinets
We started with a simple step: Painting the cabinets. I tried every trick in the book to restore these babies but boy they were just in too bad of shape.
- Sand down cabinets with fine sandpaper
- Wipe down and clean off well
- Prime
- Paint (2 coats)
- Don't lay cabinet doors on each other to move
- Hang back up without drilling your finger into that cabinet door
Inside Paint- Iron Ore by Sherwin Williams
Outside Paint- Marshmallow by Sherwin Williams
New hardware- Chrome Round Cabinet Knob (Lowes)
I also decided to keep the doors off of the large cabinet and use it as a shelf. What do you think? Ps. It does need more nicknacks on it but haven't gotten around to buying random things yet. Derek is shocked.


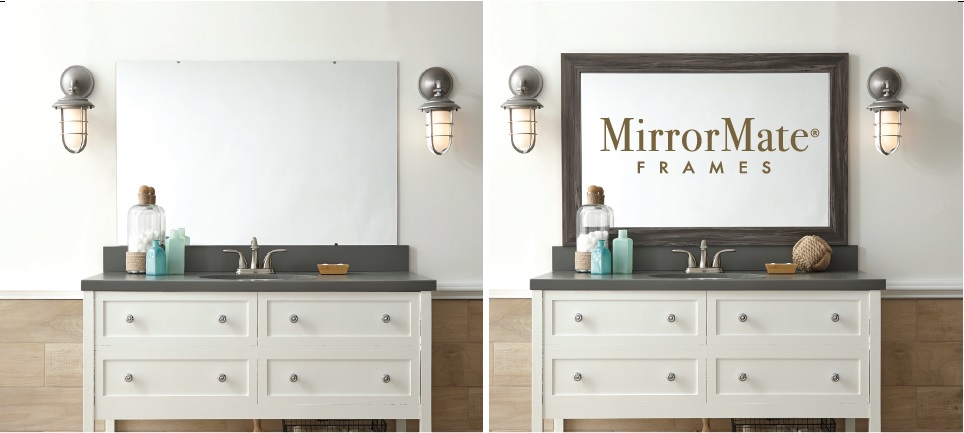
Larger than Life Mirror
If you have a retro bathroom, you also probably have a giant untrimmed mirror.

We trimmed out the mirror with a MirrorMate. These guys create and customize a frame specifically for your mirror. We chose the Chelsea Classic White frame and it was delivered within two weeks.
Mirror Mate Frame
- Order 3 free samples online
- Once you decide on the trim, measure your mirror using their instructions
- Ta-da. It will arrive within 2 weeks
- Unbox your frame and lay it out on a flat surface
- Attach/ glue the corners (they send you everything you need)
- Peel back the stickers and simply place on the mirror


A huge thank you to MirrorMate for gifting us the frame, which makes a huge difference in the space.
Simple Hardware Updates


Although I wish Derek had a GoPro on his head to film us switching out faucet, you will just have to believe me when I say it was quite the process. We decided to update all the hardware in the bathroom to match what was already tiled onto the wall...chrome.
We also swapped out the child size pink toilet (how did I not get a picture of that beauty?!) and purchased The Beverly. If your name is Beverly, don't be mad at us, be mad at Lowes for naming a toilet after you.

Chrome Faucet
Canned Light Converter Kits
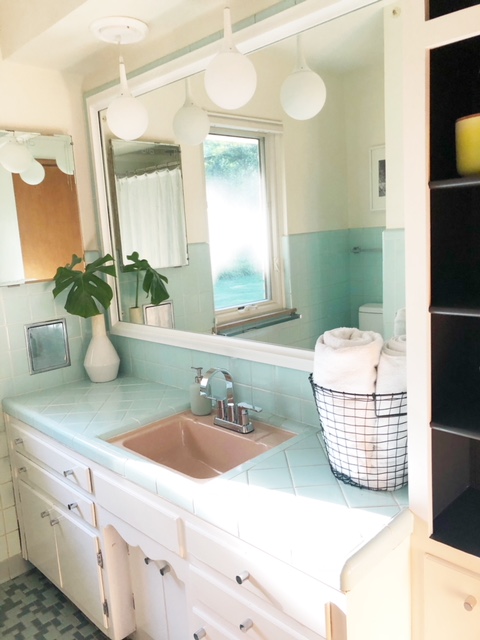
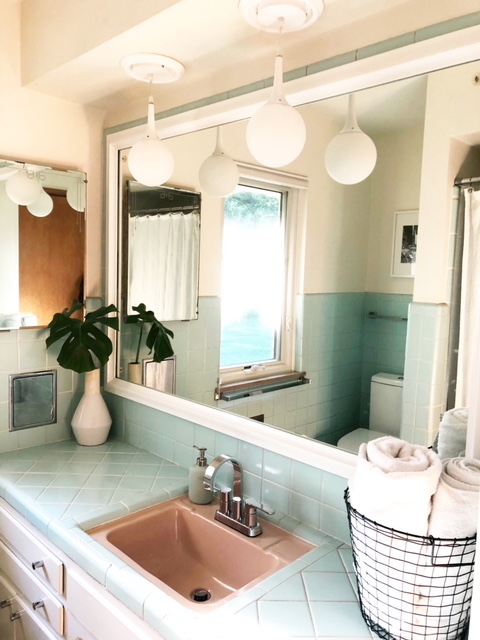
The last big project was swapping out our canned lights for these mini-pendants.
Did you know you can buy canned light converter kits? You will want to order your new pendant lights first and then purchase a kit that fits those pendants.
The mini-pendants make a huge difference and really help tie in the retro feel.
Canned Light Converter Kit
So tell us, did you have a retro bathroom growing up (or in your current home)?!
With Love,
The Lavenders